> For the complete documentation index, see [llms.txt](https://docs.sentifyd.io/llms.txt). Markdown versions of documentation pages are available by appending `.md` to page URLs; this page is available as [Markdown](https://docs.sentifyd.io/manual-web-integration/quick-start-guide.md).
# Quick Start Guide
Integrating Avatars in Websites & Apps
## Quick Start Guide
### Introduction
This guide will walk you through the simple steps needed to integrate a Sentifyd 3D AI avatar into your website or web application. To begin, ensure you have the avatar's API key, which can be found in the Sentifyd platform under the avatar section.
### Preparation: Create an Avatar
Before you can deploy an avatar, you need to create and train it on the Sentifyd platform. In addition, customize the avatar widget using the customization panel provided on the avatar page. Once done, open the Website Deployment modal from the avatar page.
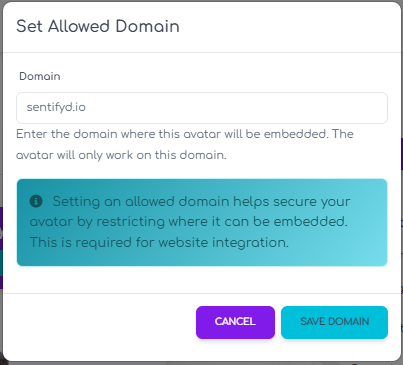
### Step 1: Set Allowed Domain
This is a required step to allow the avatar to be deployed on your website. Add your website domain and click on Save Domain.
### Step 2: Copy the Avatar Embed
Use the provided embed creator to configure and copy your avatar embed.
{% hint style="info" %}
#### **Security Note:**
Exposing your avatar API key in the frontend is generally safe. This key is public and only permits interaction with the avatar, and its usage is restricted by the “allowed domains” setting—meaning the avatar cannot be deployed on unauthorized websites.
If you prefer not to expose your avatar API key at all, you can follow our Backend-for-Frontend (BFF) guide to issue short-lived access tokens instead.
{% endhint %}
**Optional: Advanced customization of the Avatar**
You can customize your avatar's behavior and appearance using additional attributes on the `` or `` component. For a full list of customization options, please refer to the detailed guide on the `` / `` Web Components.
### Step 3: Deploy on Your Website
Next, copy and add the avatar embed code to your website wherever you want the avatar to appear. Make sure the script tag is placed in the head or at the end of the body element. If you chose the toggler option, the parent size does not matter and the avatar will be deployed floating in the page's bottom-right corner.